
About a year ago I compared and contrasted different SFTP options for backing up your Cisco Collaboration Infrastructure. At some point after that I learned that Windows Server 2019 integrated OpenSSH directly. Being that it is a Cisco supported solution, the choice is obvious. The free solution with unlimited file size is obviously the best choice.
Today I’m going to talk about setting that up.
Initial Server Setup and OpenSSH Installation
- Set up your Windows Server 2019 to your choosing.
- Set up a service account in active directory to serve as the SFTP account. Alternatively, you’re login credentials to the server will serve as your SFTP credentials.
- Open up PowerShell – Run as administrator
- Input the following commands, in this order:
# Determine if it is already installed.
Get-WindowsCapability -Online | ? Name -like 'OpenSSH*'

# When used in an enterprise environment, WSUS often can interfere with the installation of OpenSSH.  We will disable WSUS, install OpenSSH, and then set it back to its original settings.

# Get current WSUS setting
$existingValue = (Get-ItemProperty -Path 'HKLM:\SOFTWARE\Policies\Microsoft\Windows\WindowsUpdate\AU' -Name UseWUServer).UseWUServer

# Disable WSUS
Set-ItemProperty -Path 'HKLM:\SOFTWARE\Policies\Microsoft\Windows\WindowsUpdate\AU' -Name UseWUServer -Value 0

# Restart WSUS
Restart-Service wuauserv

# Install the OpenSSH Server
Add-WindowsCapability -Online -Name OpenSSH.Server~~~~0.0.1.0

# Install the OpenSSH Client
Add-WindowsCapability -Online -Name OpenSSH.Client~~~~0.0.1.0

# Set WSUS back to original setting (probably 1)
Set-ItemProperty -Path 'HKLM:\SOFTWARE\Policies\Microsoft\Windows\WindowsUpdate\AU' -Name UseWUServer -Value $existingValue

# Restart WSUS
Restart-Service wuauserv

#Confirm it is installed
Get-WindowsCapability -Online | ? Name -like 'OpenSSH*'
5. Reboot the server.
Confirm you can connect
Using an SFTP client on your PC or another server, confirm you can connect to the server.
Change the root directory
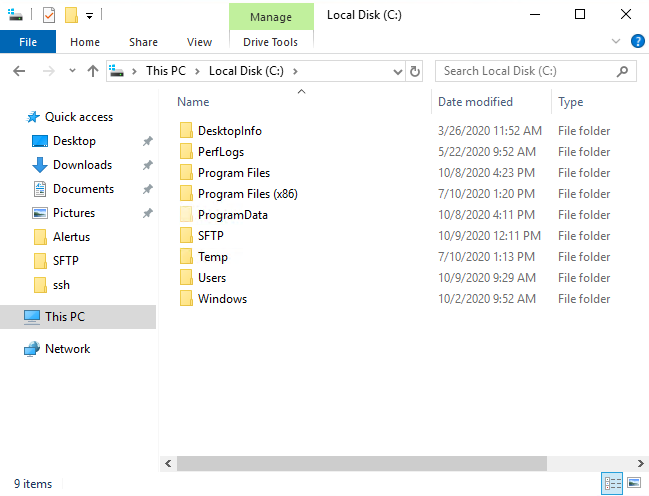
By default, OpenSSH will save all files directly to the C drive. You will need to change this via the sshd_config file.
- Create a new folder within the C drive called SFTP
2. Run Notepad as an administrator
3. File > Open
4. Navigate to C:/ProgramData/ssh
5. Change File Types to All Files
6. Select sshd_config and Open
7. Under Match Group Administrators, add the following two lines:
Match Group administrators
    ChrootDirectory C:\SFTP
    ForceCommand internal-sftp
8. Save the file
9. open services.msc
10. restart the OpenSSH SSH Server service.
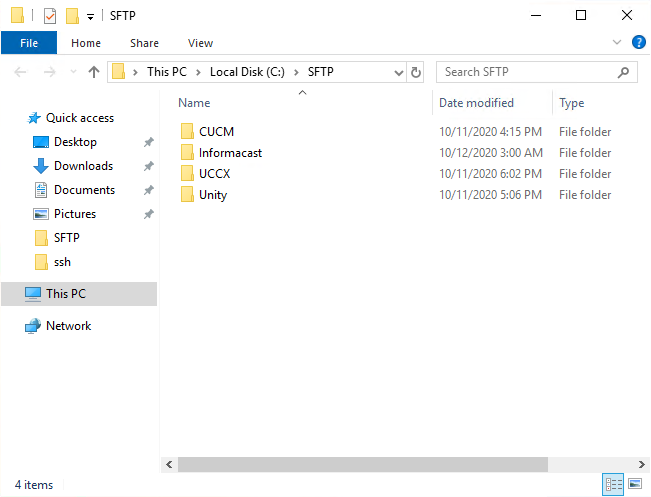
Create subfolders for each system for better organization
To keep the system organized, let’s create subfolders for each system so that they are easy to identify.
Configure Backup Devices in CUCM, Unity, and UCCX
Most collaboration systems utilize the same interface, with the exception of Cisco Paging Server (informacast). I will go over the standard cisco interface, as well as informacast.
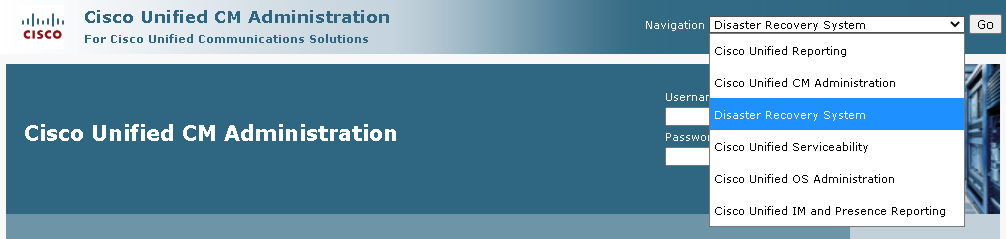
First go to CUCM, Unity, or UCCX and navigate to the Disaster Recovery System.
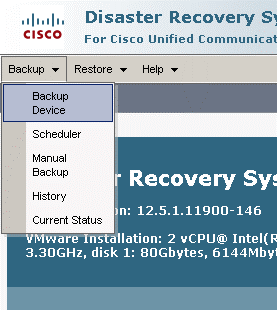
Go to Backup > Backup Device
Click Add New
Enter the SFTP servers information, including the IP address of the server, the subfolder for the path name, and the username and password of the service account set up earlier.
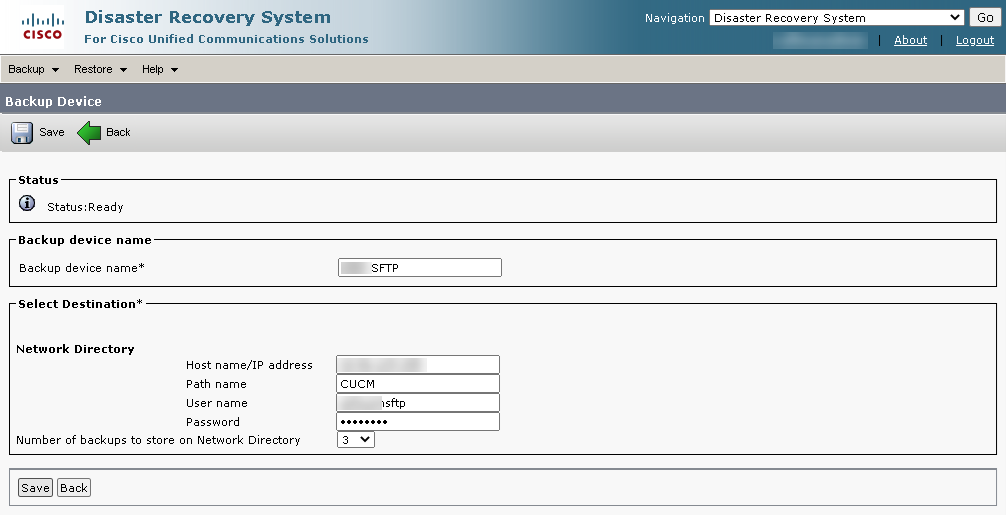
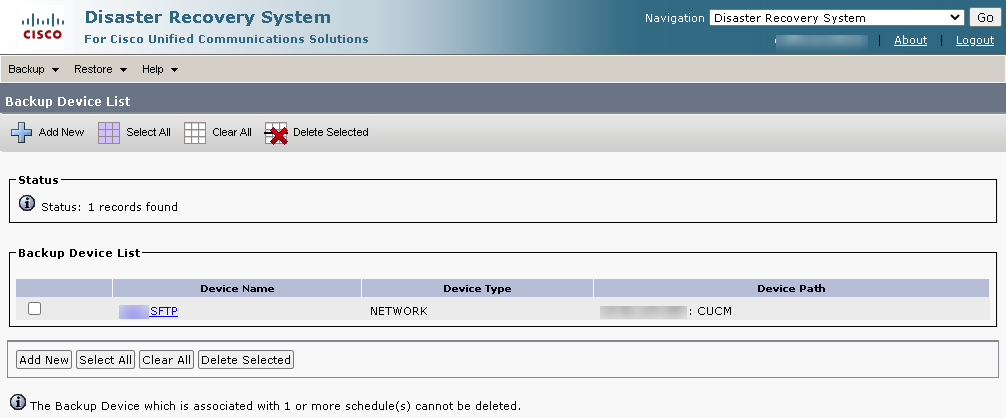
Once you hit save, confirm the device appears in the Backup Device List.
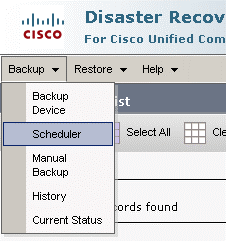
Now click on Backup > Scheduler
Enter a schedule name, select the backup device name, and select all of the features.
Set a Start Backup at* time at some point in the future. The system cannot accept a past date and time. Set the frequency to daily. Click save.
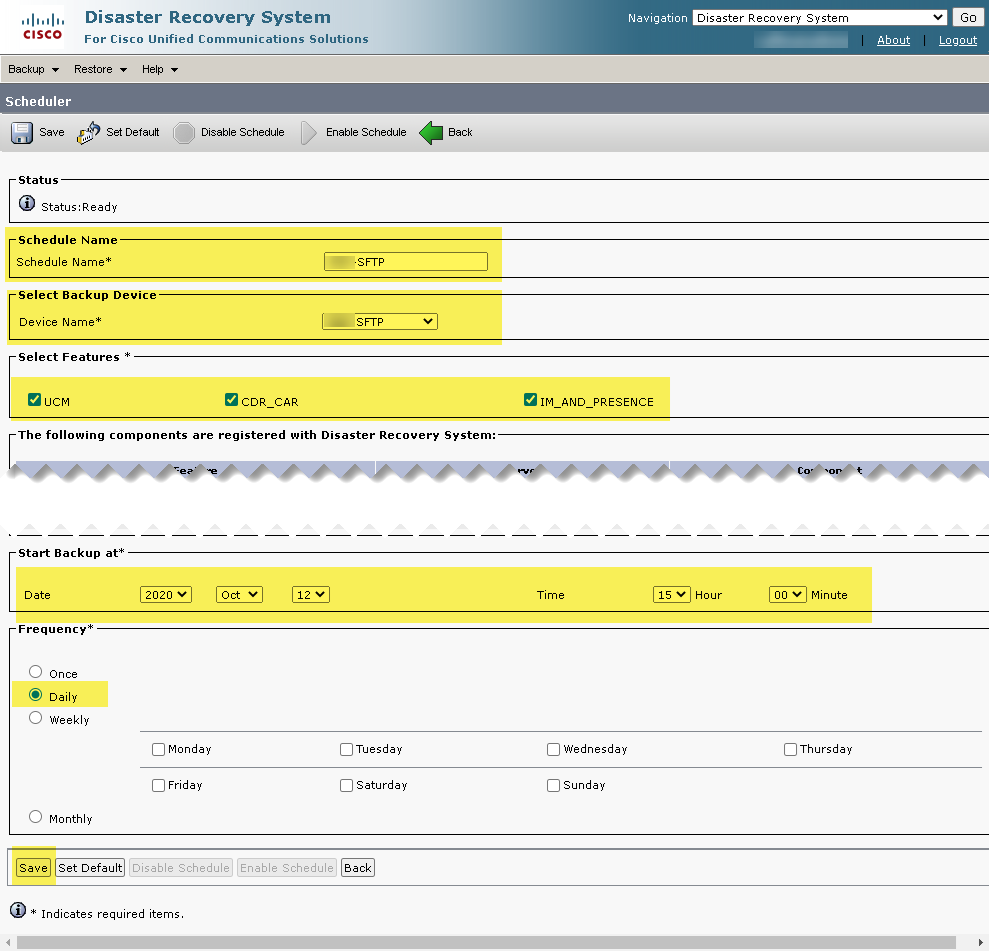
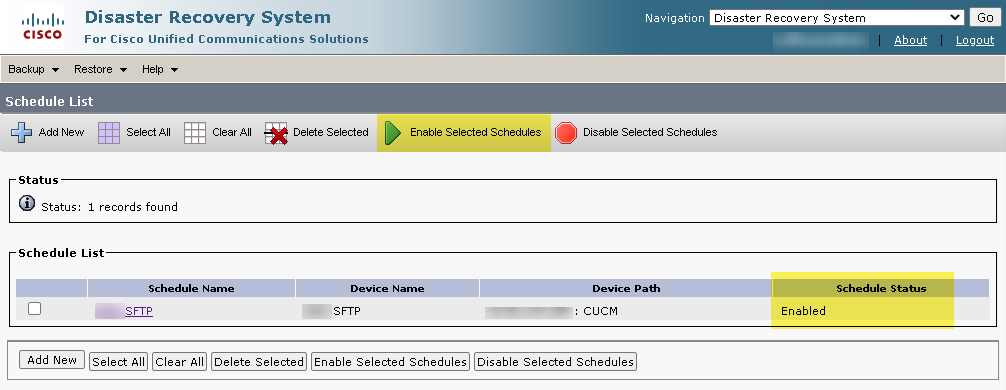
Ensure your schedule is enabled after saving it. If it isn’t, select the check box next to the schedule and hit the Enable Selected Schedules button.
Configure backup devices in Informacast
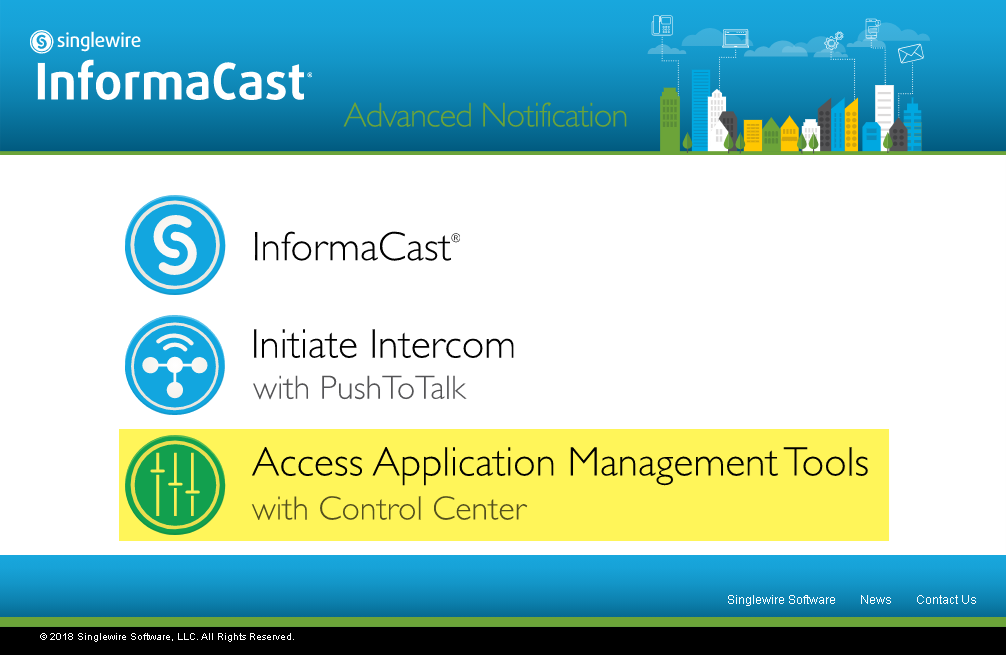
Navigate to your Informacast server and click on the Access Application Management Tools with Control Center option.
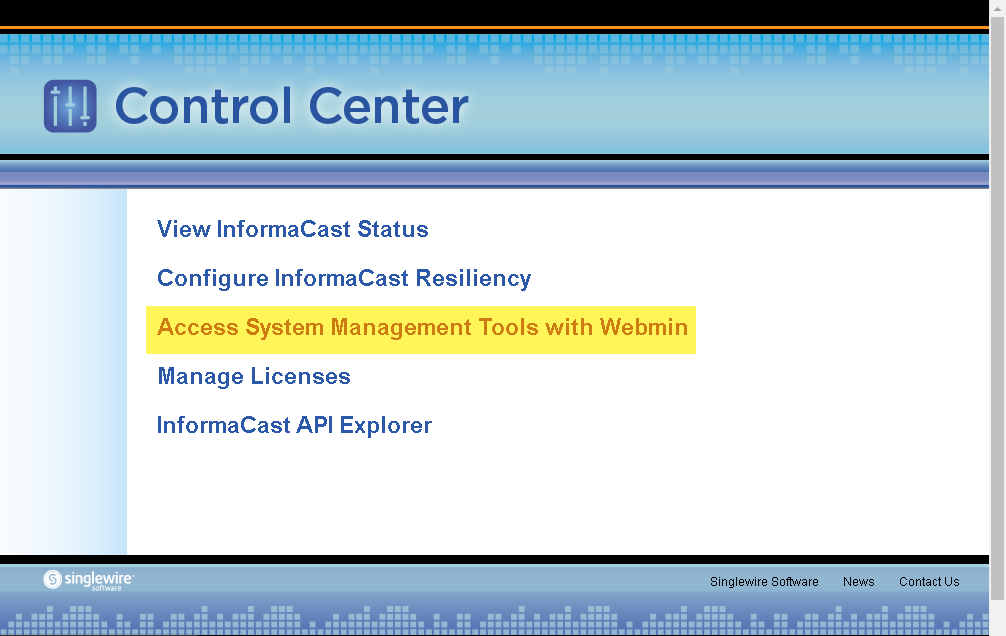
Click on Access System Management Tools with Webmin
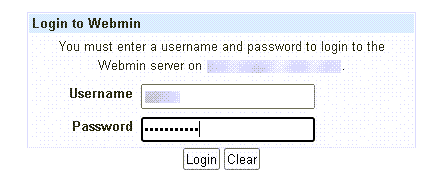
Login
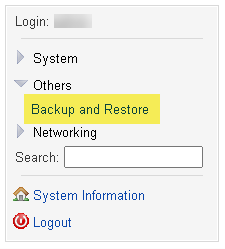
Under Others, select Backup and Restore.
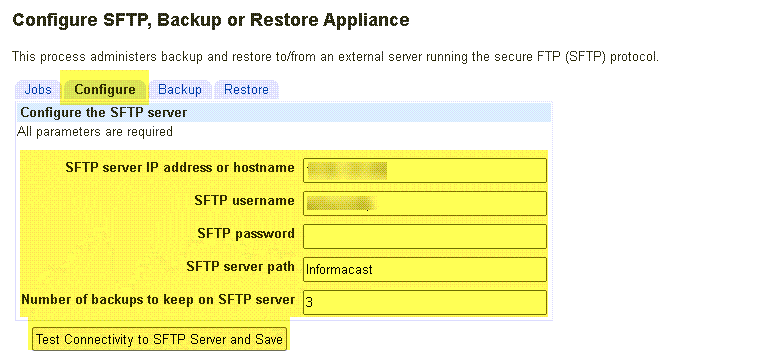
Under the Configure tab, enter the server ip, service account username and password, the subfolder we crated earlier as the path, and set number of backups to 3. Then select Test Connectivity to SFTP Server and Save.
Resources
OpenSSH initially would not install via GUI nor CLI. This resource provided the commands to get it to install:
https://blog.superautomation.co.uk/2019/07/error-while-attempting-to-install.html
This is the actual Microsoft documentation for installing OpenSSH:
https://docs.microsoft.com/en-us/windows-server/administration/openssh/openssh_install_firstuse

Jaron Davis
Unified Communications Architect specializing in enterprise Zoom, Microsoft Teams, Cisco UC modernization, SIP/VoIP infrastructure, and systems architecture.